Optical Markers
ARENA can support different optical markers: Apriltags, has experimental (outside the mainline code) support for lightanchors/flash, and more are expected to be added.
note
You can obtain Apriltags with different ids and sizes in our Apriltag repo.
Requirements
Optical Markers require support for ARENA’s computer vision processing pipeline, which is supported by the custom camera access implemented in WebXR Viewer and XR Browser, and also by WebXR’s raw camera access currently implemented in Chrome.
Check out the Platforms Section for details on browsers and platforms that support optical markers in ARENA.
warning
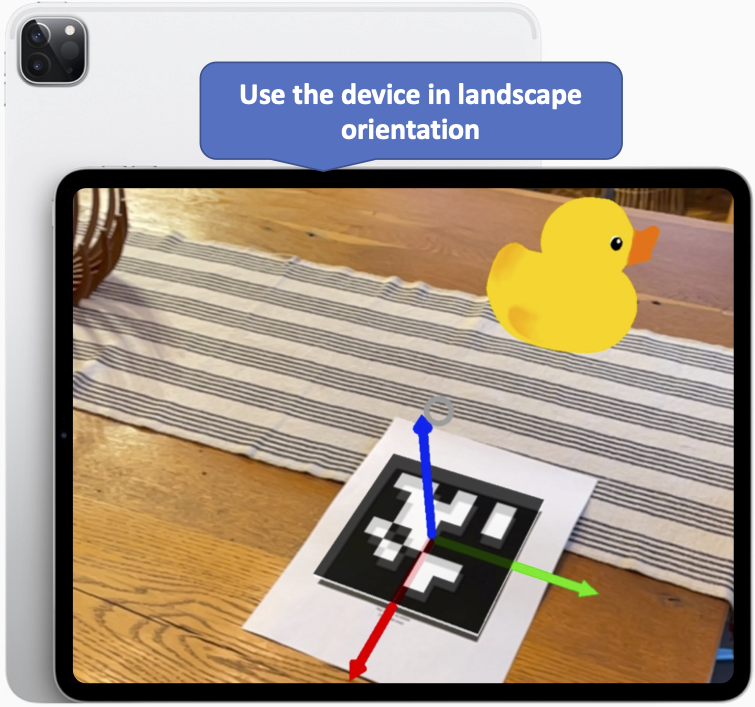
IMPORTANT: Use the device in landscape orientation
The ARENA localization solver for optical markers assumes that the device is in portrait orientation, and we recommend locking the device to landscape orientation. For example, the picture below shows a blue box at the origin scene. While not visible, the blue box is overlaid on an AprilTag anchoring the Scene. The device is in landscape orientation.
Attaching an ARMarker Component to Scene Objects
Optical markers are added to ARENA scenes by attaching ARMarker components to scene objects. To perform relocalization, the ARENA location solver must know the pose of the detected marker. It will first try to find objects in the Scene with ARMarkers attached to use the pose of these objects, and if no data about a marker is found in the Scene, it will query ATLAS. Markers with ID 0, however, are assumed to mark the origin: 0, 0, 0 (x, y, z). You can override the ID 0 parameters in the Scene if desired.
This section will describe how this can be achieved and provide some examples.
An ARENA scene might contain several markers with GPS coordinates and local coordinates referenced from the Scene’s origin. The following image exemplifies how to attach an ARMarker component to a geometry object in a scene (in this case, a box), using the scene builder:
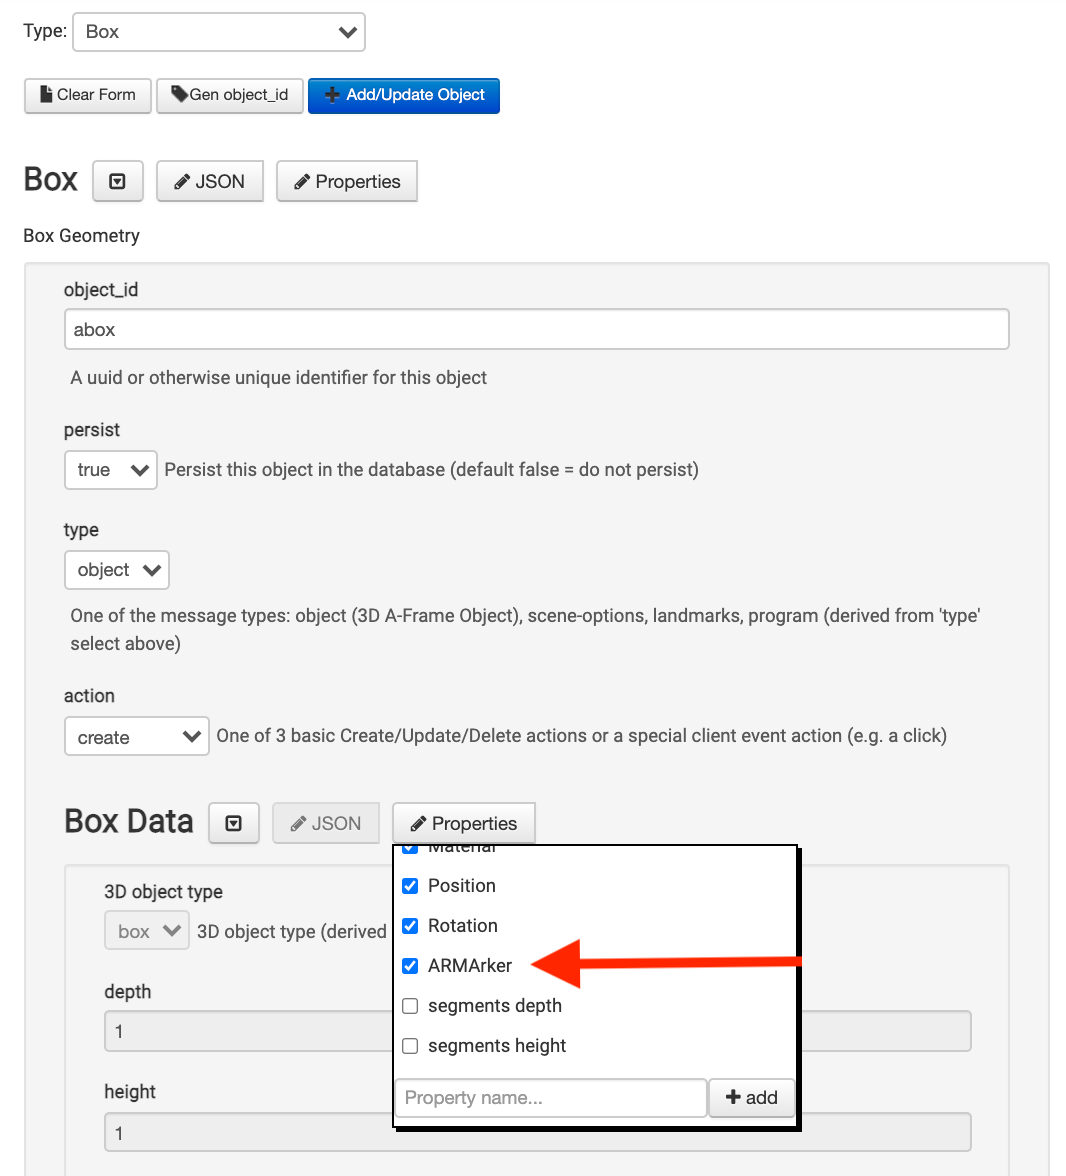
The ARMarker component that will appear at the end of the form will allow defining properties of the marker:
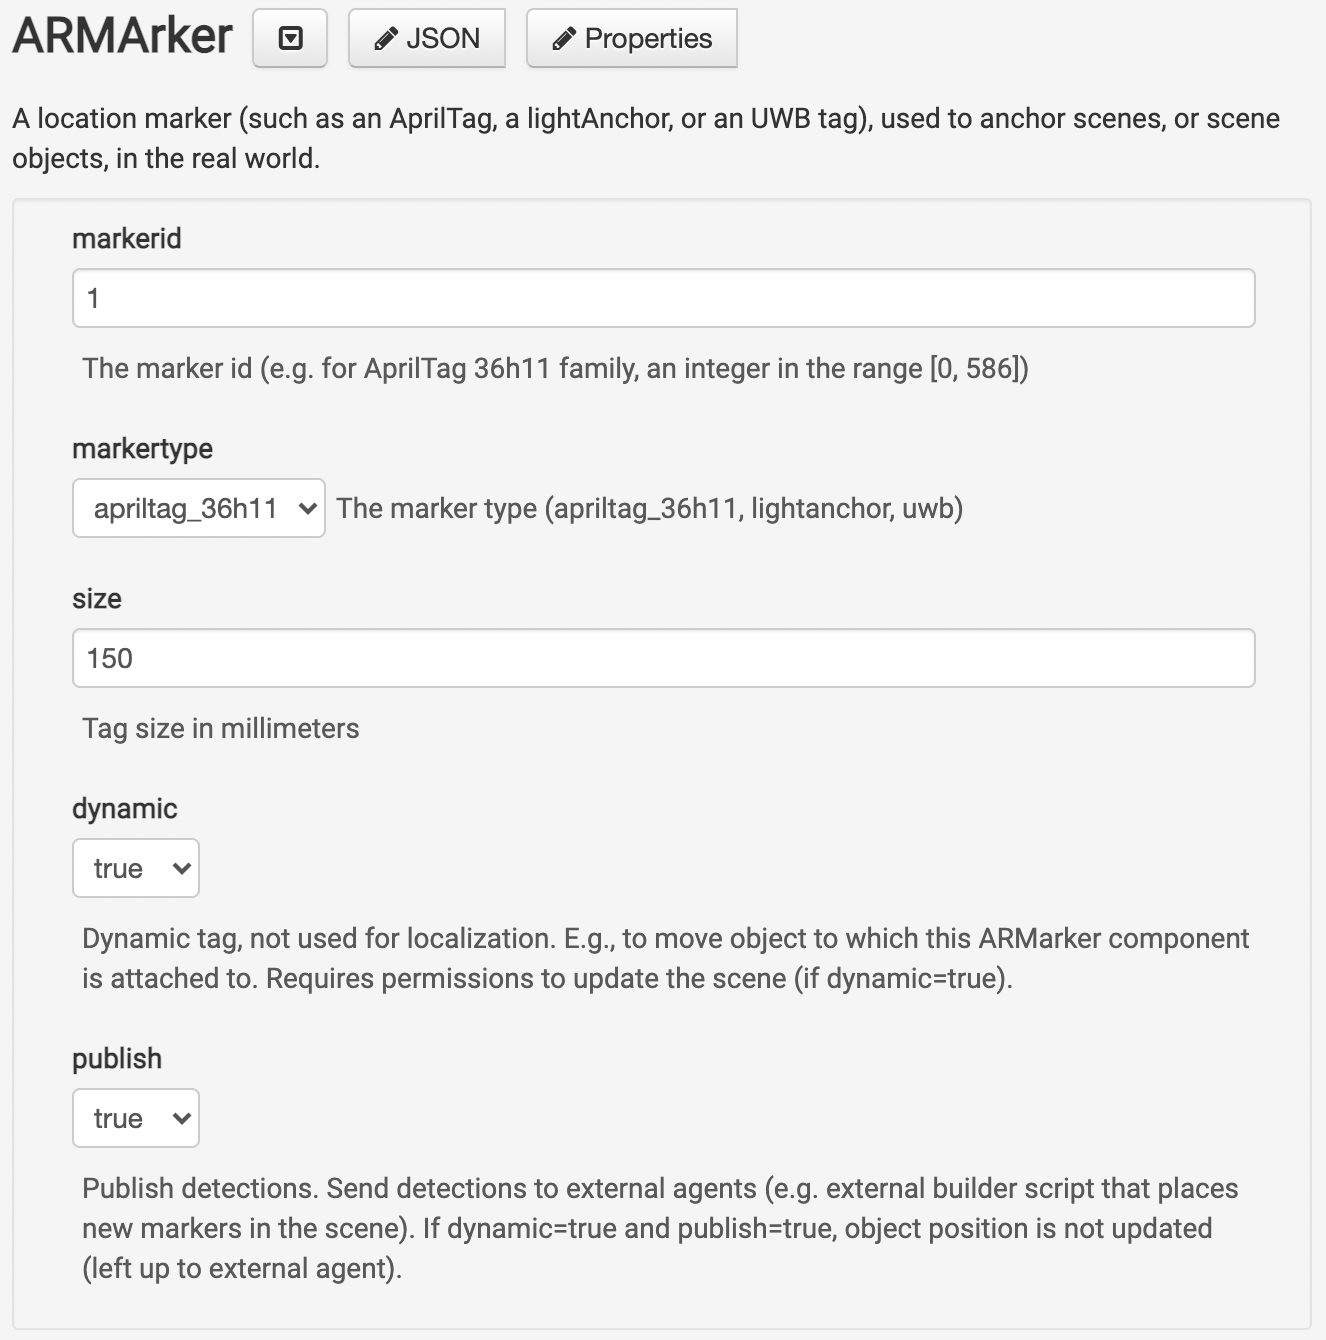
The image above shows the default ARMarker component attributes. A few more attributes, such as GPS coordinates and a URL attached to the marker can also be added. The examples below will show how to use these properties in more detail using Apriltags, the most common ARMarkers used in ARENA.
Coordinate System
In ARENA’s world coordinate system (shown as i. in the figure below), positive in the x-axis is to the right, positive y-axis is up, and positive z-axis is out of the screen. The origin at 0, 0, 0 (x, y, z) is the center of the world. Also see the Coordinate System Map.
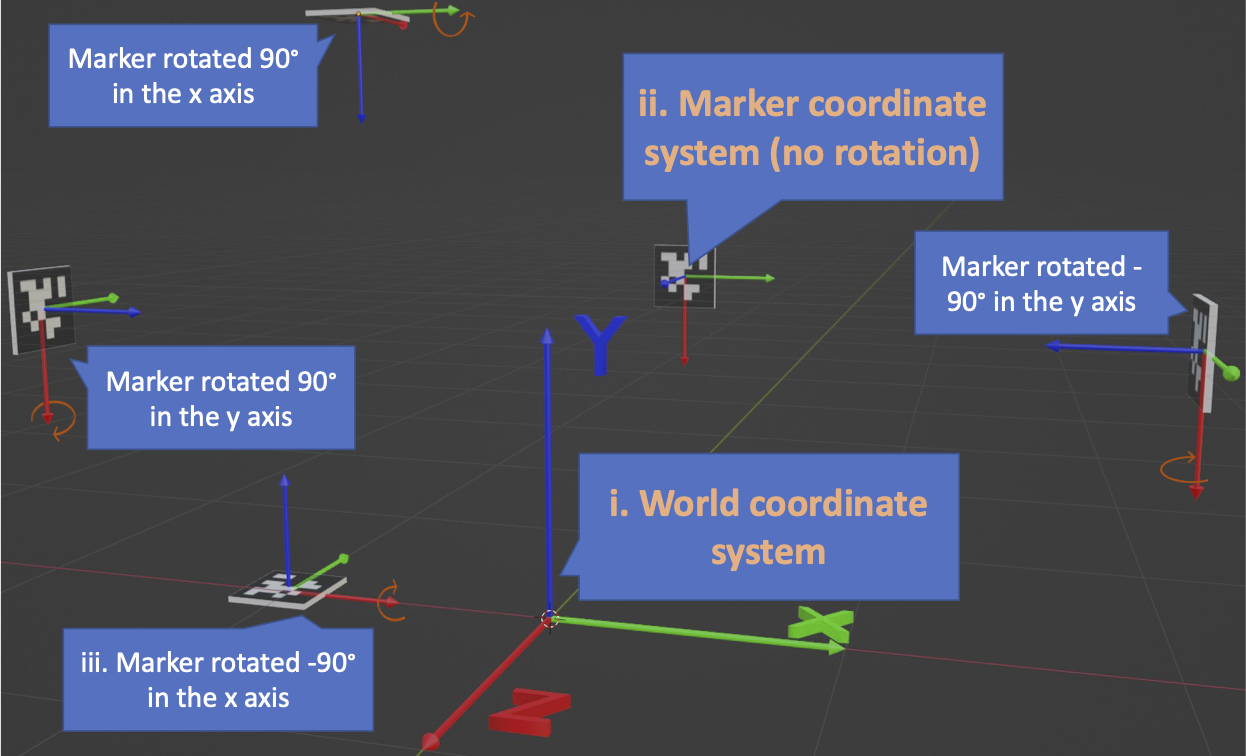
The figure shows examples of markers and how their orientation aligns with ARENA’s coordinate system. For example, a vertical marker along the world’s z-axis (shown as ii. in the figure) does not need a rotation as this aligns with the marker’s local coordinate system. However, a marker laid horizontal on the ground (iii. in the figure) is rotated by -90° in the x-axis.
The ARENA pose solver knows the pose of the marker by looking at the object to which a corresponding ARMarker component is attached. To indicate the pose of markers, we enter it as the pose of an object placed in the Scene to which we link an ARMarker component that has the identifier of the marker. See the ‘fixed origin maker’ example below for a concrete example.
Examples
Apriltags are a common type of low-bit density optical markers that can be used in ARENA. ARENA can decode AprilTags (36h11 family) in browsers that allow camera access (see the Requirements Section for details). The following examples show how to use Apriltags to anchor content in the real world.
Fixed Origin Marker
To add a marker and reference the Scene’s origin in the real world, we add an object (named ‘origin-marker’ in the example) that will visually represent the marker at coordinates 0,0,0 (x, y, z). Then, we attach an ARMarker component to it. Because the marker is laid horizontally on the ground, we have to rotate the object (that visually represents the marker) by -90° in the x-axis.
Check the example Scene in ARENA. The AprilTag references the origin of the Scene in the real world. Here, we placed it near the corner of the carpet:
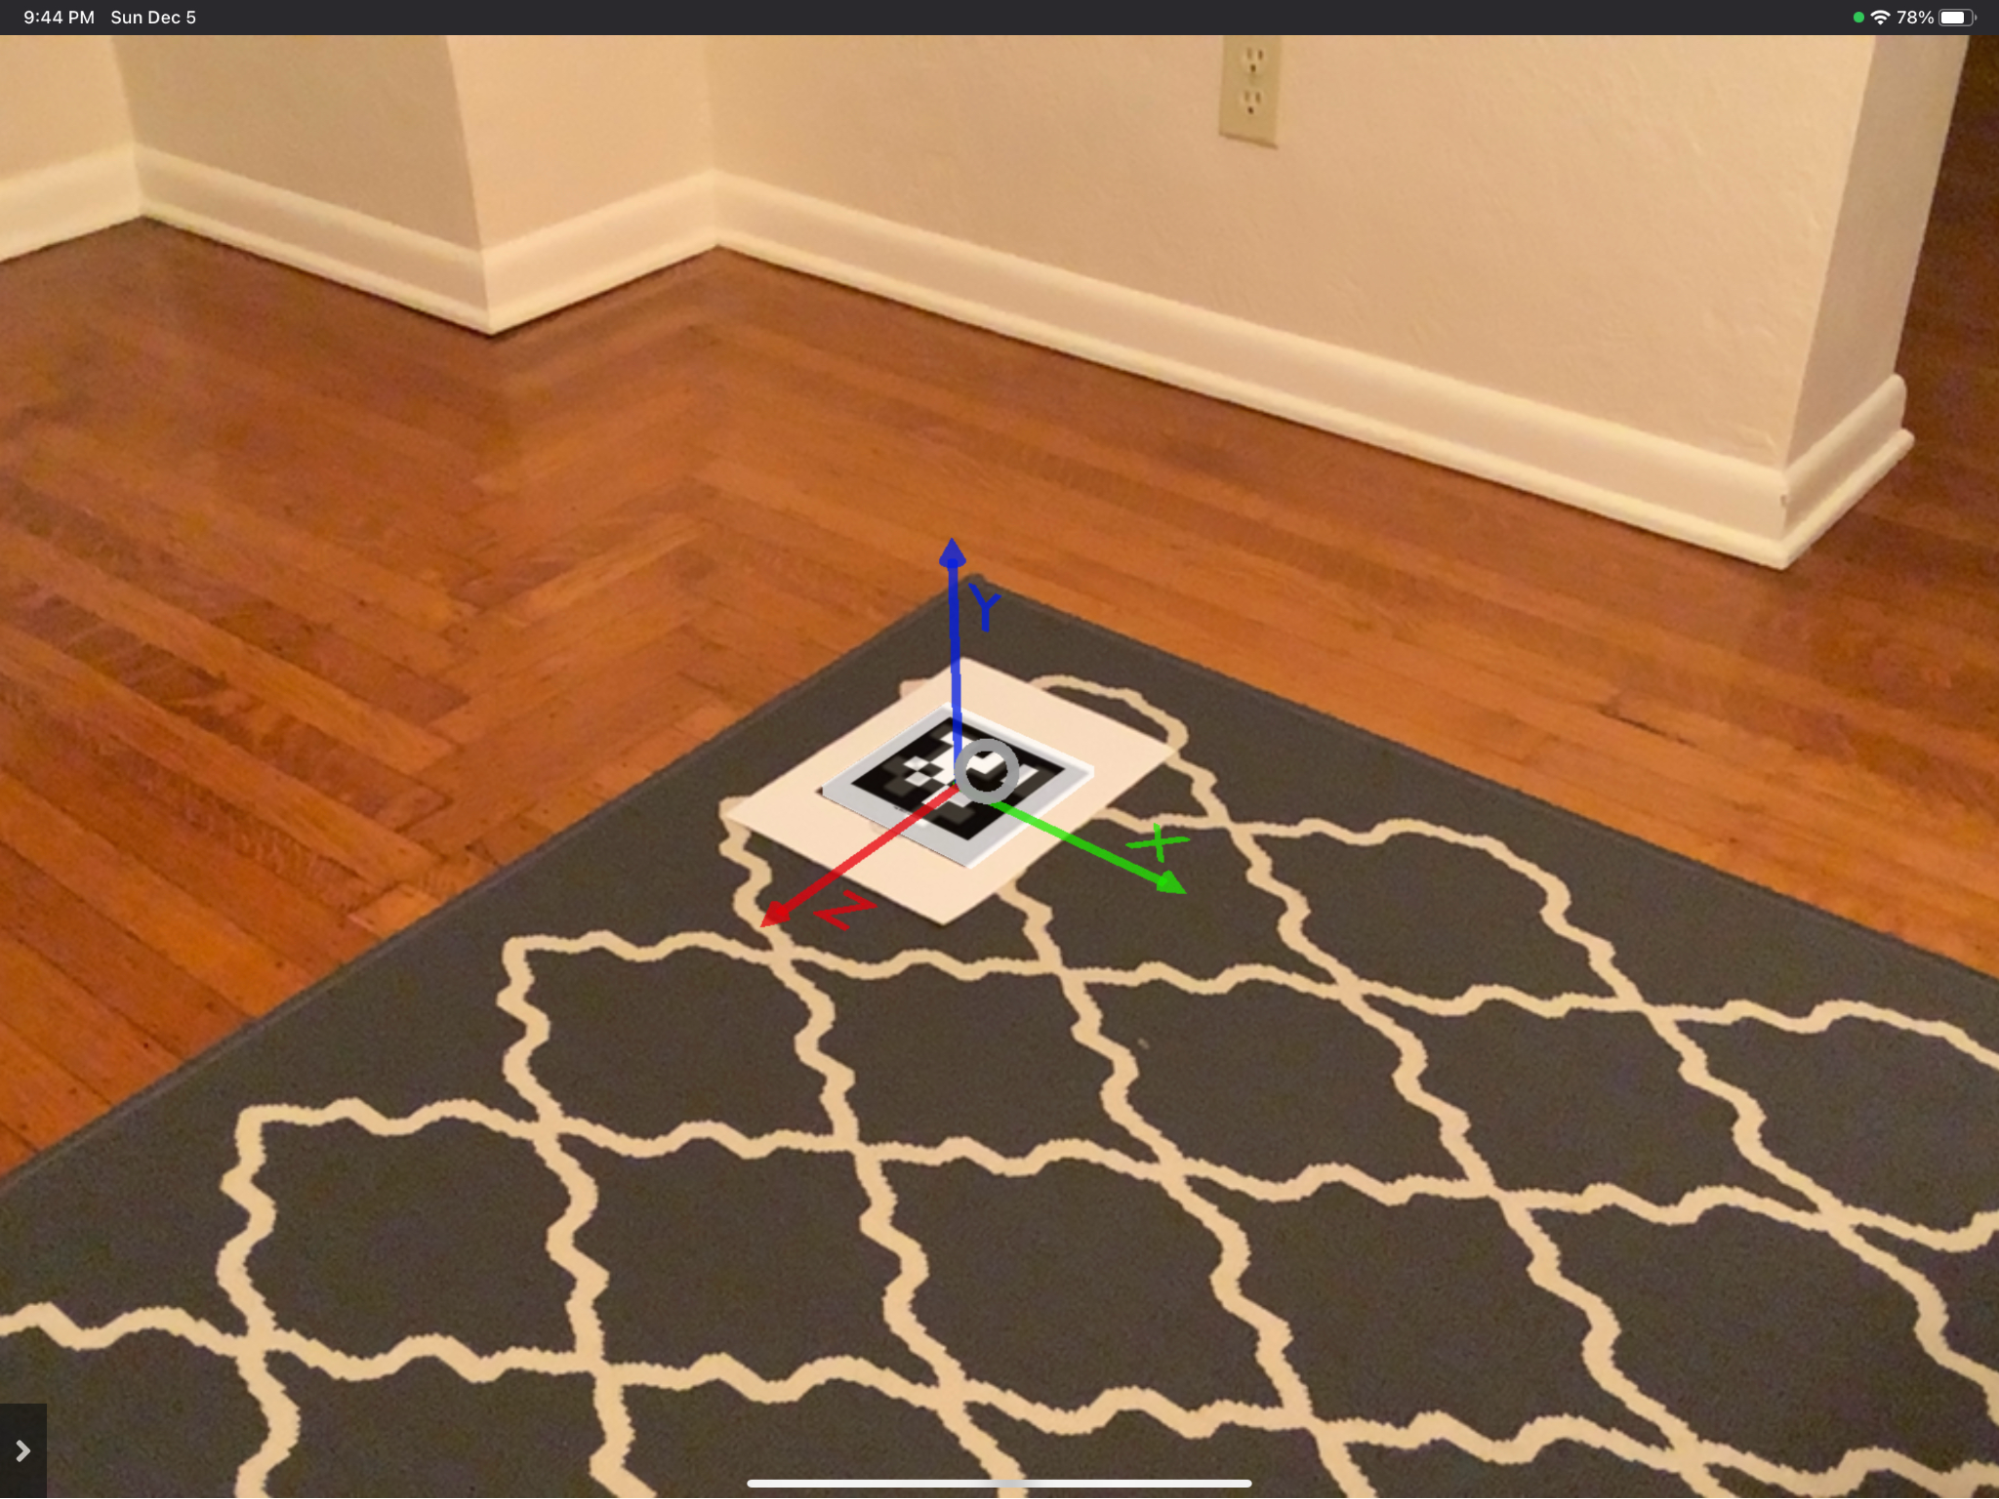
In the example, we add a .gltf to the Scene that visually represents the AprilTag and the reference axis. This object is placed at 0, 0, 0 (x, y, z), and we attached an ARMarker with id 0 and size 150 mm (the id and size of the AprilTag placed on the floor), and set it as static (dynamic=false) and not buildable (buildable=false). The object (the .gltf) is rotated by -90° in the x-axis. The entire object definition that you can enter in the scene builder is in our ARMarker schema definition.
Dynamic Marker
To use a dynamic marker, we need to first reference the Scene in the real world. As shown in the previous example, we can do this by adding an AprilTag at the origin.
Let us say we want to move a geometry, say a box, in the Scene. We add the box to the Scene and attach an ARMarker that we set as dynamic (this must be a different id than the AprilTag used to reference the Scene’s origin). The second object will move in the Scene every time an observer with permission to change the Scene sees the corresponding AprilTag. This last part is essential; observers who cannot change the Scene will not update the box’s position.
Check the example here. We have an AprilTag that references the origin and a dynamic tag that moves the box. Notably, the dynamic ARMarker component should define the id of the dynamic marker (1) and the size (50 mm).
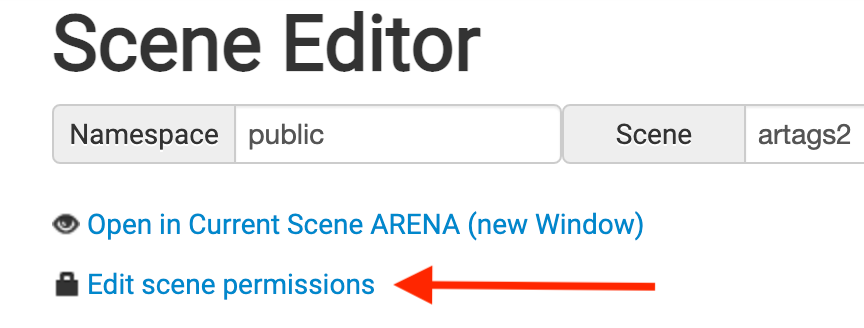
The viewer device was an IPad with XRViewer, and the user was logged in ARENA to change the box’s position once it detected the dynamic AprilTag. In the scene builder, you can edit the Scene permissions to make sure the user logged in to the viewer device can edit the Scene:

For reference, these are the attributes of the box object (named ‘dynamic-box’) we attached a dynamic ARMarker (note that the position is just the initial static position; it will be updated once the marker gets in the view of a device with permissions to update it).