Generating 3D Content Blender Animation
- ARENA-Animation repository
This details the process of creating a simple animated 3D model in Blender, and then animating it on a click event in the CONIX ARENA. It uses MQTT as a primary way of initializing and communicating with the ARENA.
Getting Started With Modeling
For this, Blender is used, as it is free and versatile. However, any other 3D modeling & animation software will work, as long as the file is exported to a *.glb or *.gltf format.
Blender can be downloaded here.
Install Blender according to the instructions for your OS. Here, we are using Blender 2.80 on Ubuntu 18.04.4.
Starting Blender
When you open Blender, choose a General new file. 
Your screen should open to the Layout tab, with a grey cube in the center of the scene. You’ll have a camera, cube, and light in the top right Scene Collection window. 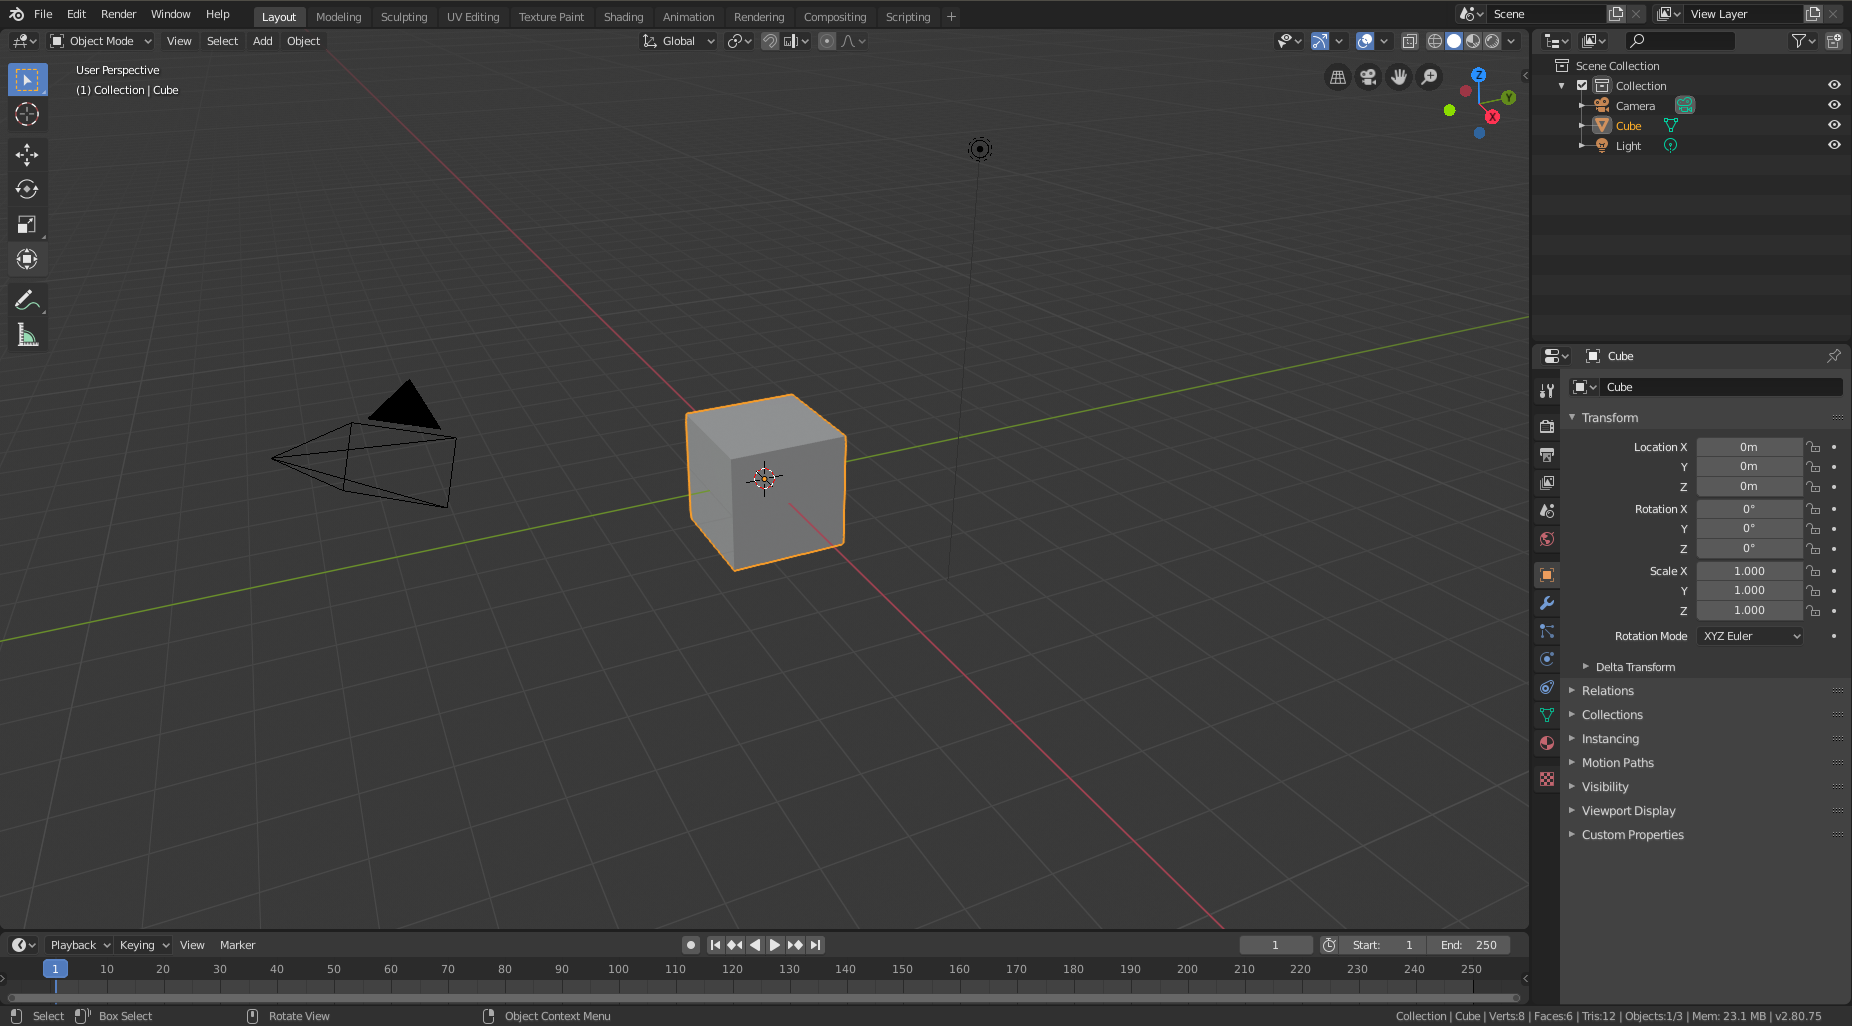
Creating New Models
For this tutorial, we will be using two shapes. In this case, we will be using a cube and a sphere. At the top of the screen to the left, click Add > Mesh > UV Sphere. 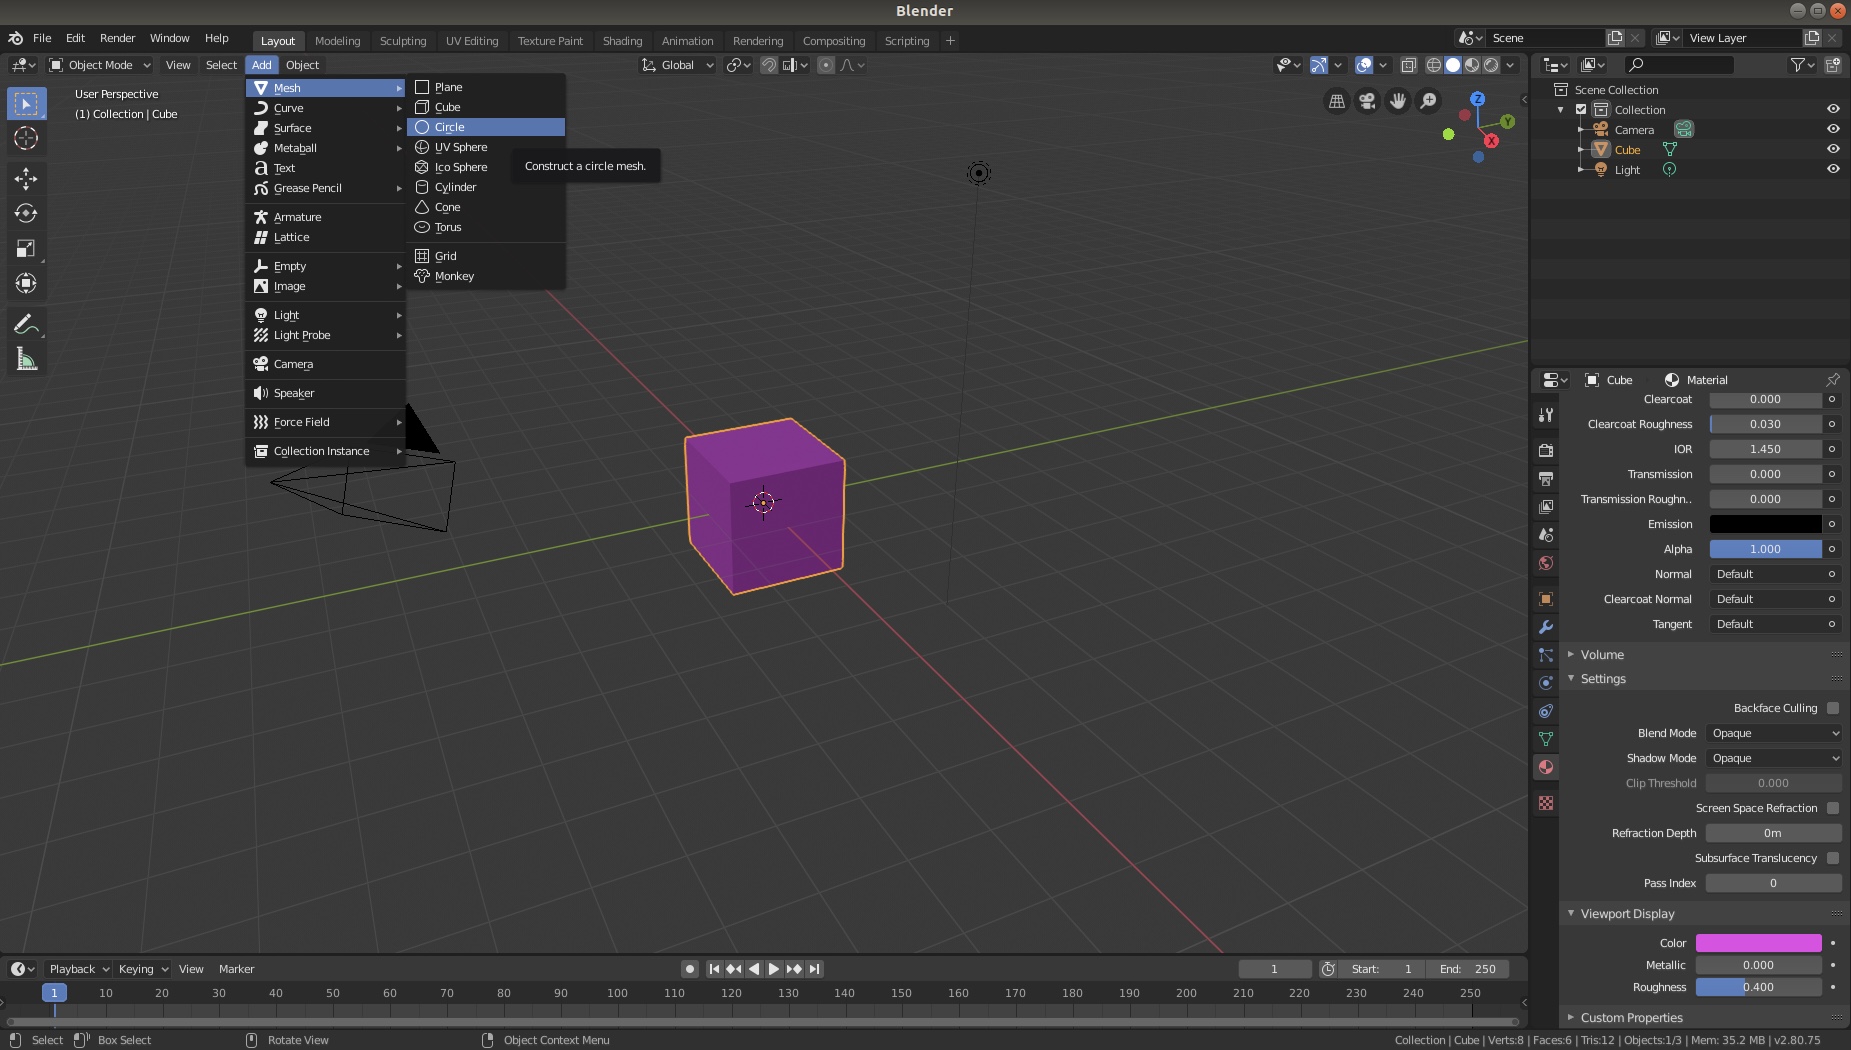 This will add a sphere to the origin of the scene.

Use the Move tool to move the sphere from the center to the starting position of your choice.
Changing colors
In the bottom right Context menu, there is a line of tabs down the side. To change the color of the rendered object, you can edit the Base Color and Subsurface Color in the Material tab. 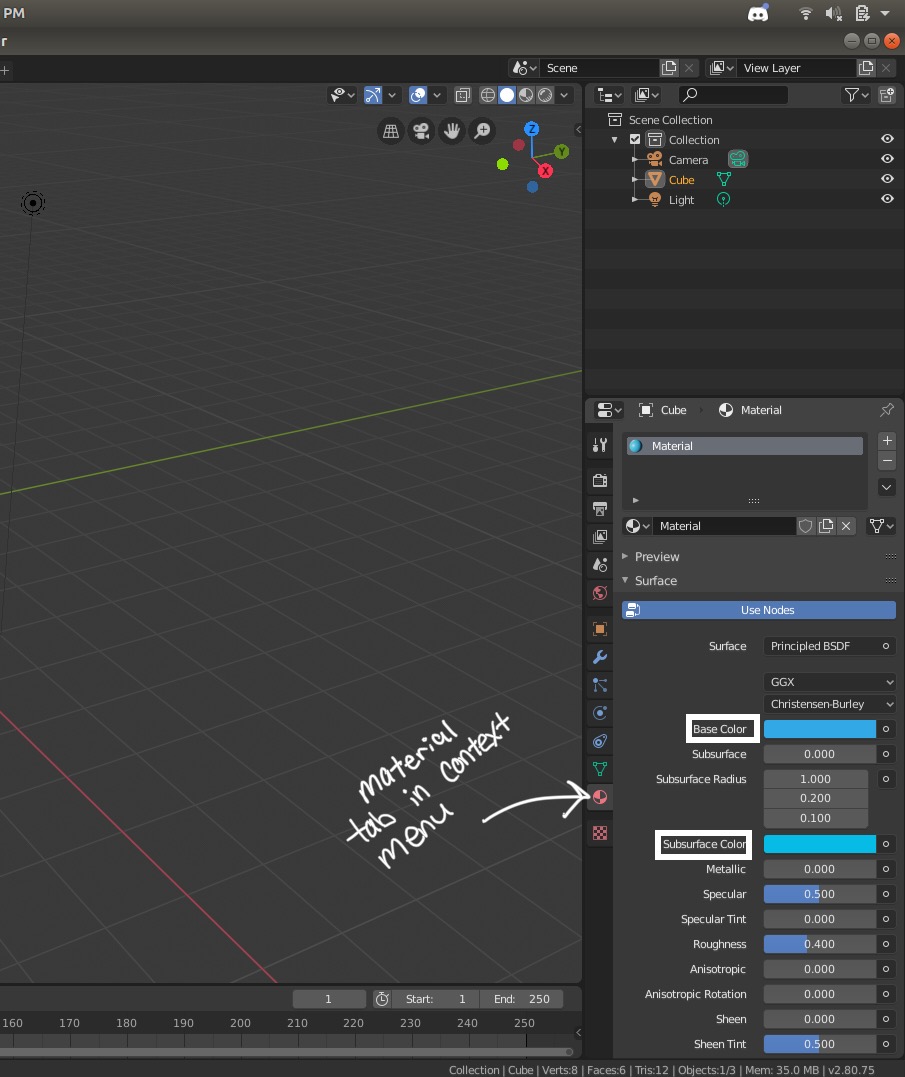 This will not show up in your Blender window, however it will be in the complete render when it’s exported. To change how it appears in the scene, scroll down to Viewport Display in the Material tab.
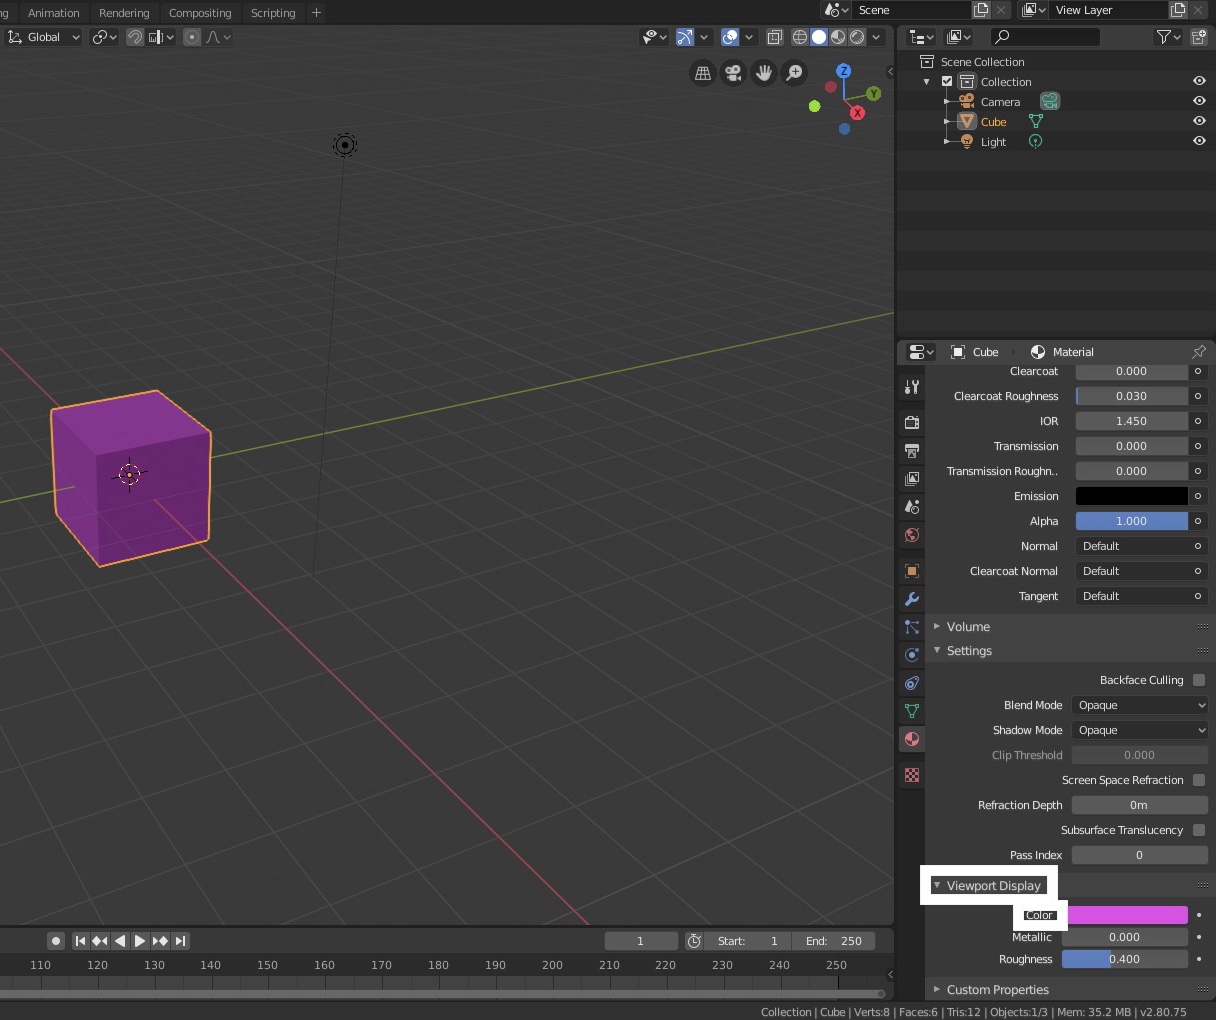
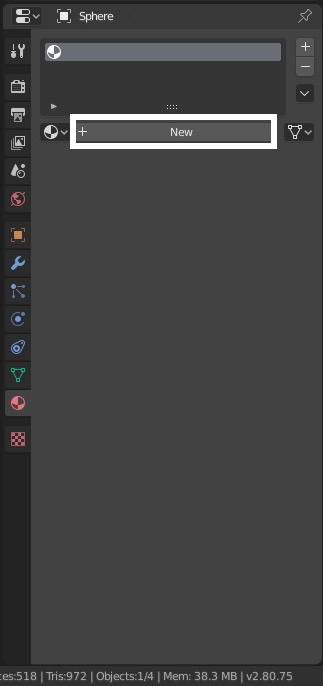
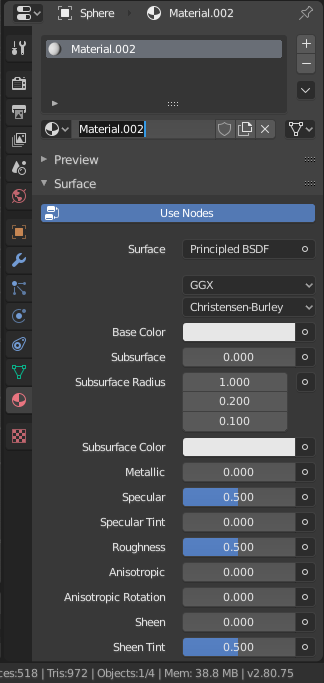
To change the color of a sphere or new mesh created, there are a few additional steps. If you select the sphere in the Scene Collection menu and go to the Material tab of the Context menu, you will notice there are no presets or settings to change, unlike the already-generated cube. Create a new material, name it whatever you want, and you can change the colors, materials, and display.
Starting Animation
At the top of the window, change from the Layout tab to the Animation tab. This window will look different, with a preview on the left, scene in the middle, and a timeline at the bottom. Right click on the cube, select ‘Insert Keyframe’, and select ‘Location’. 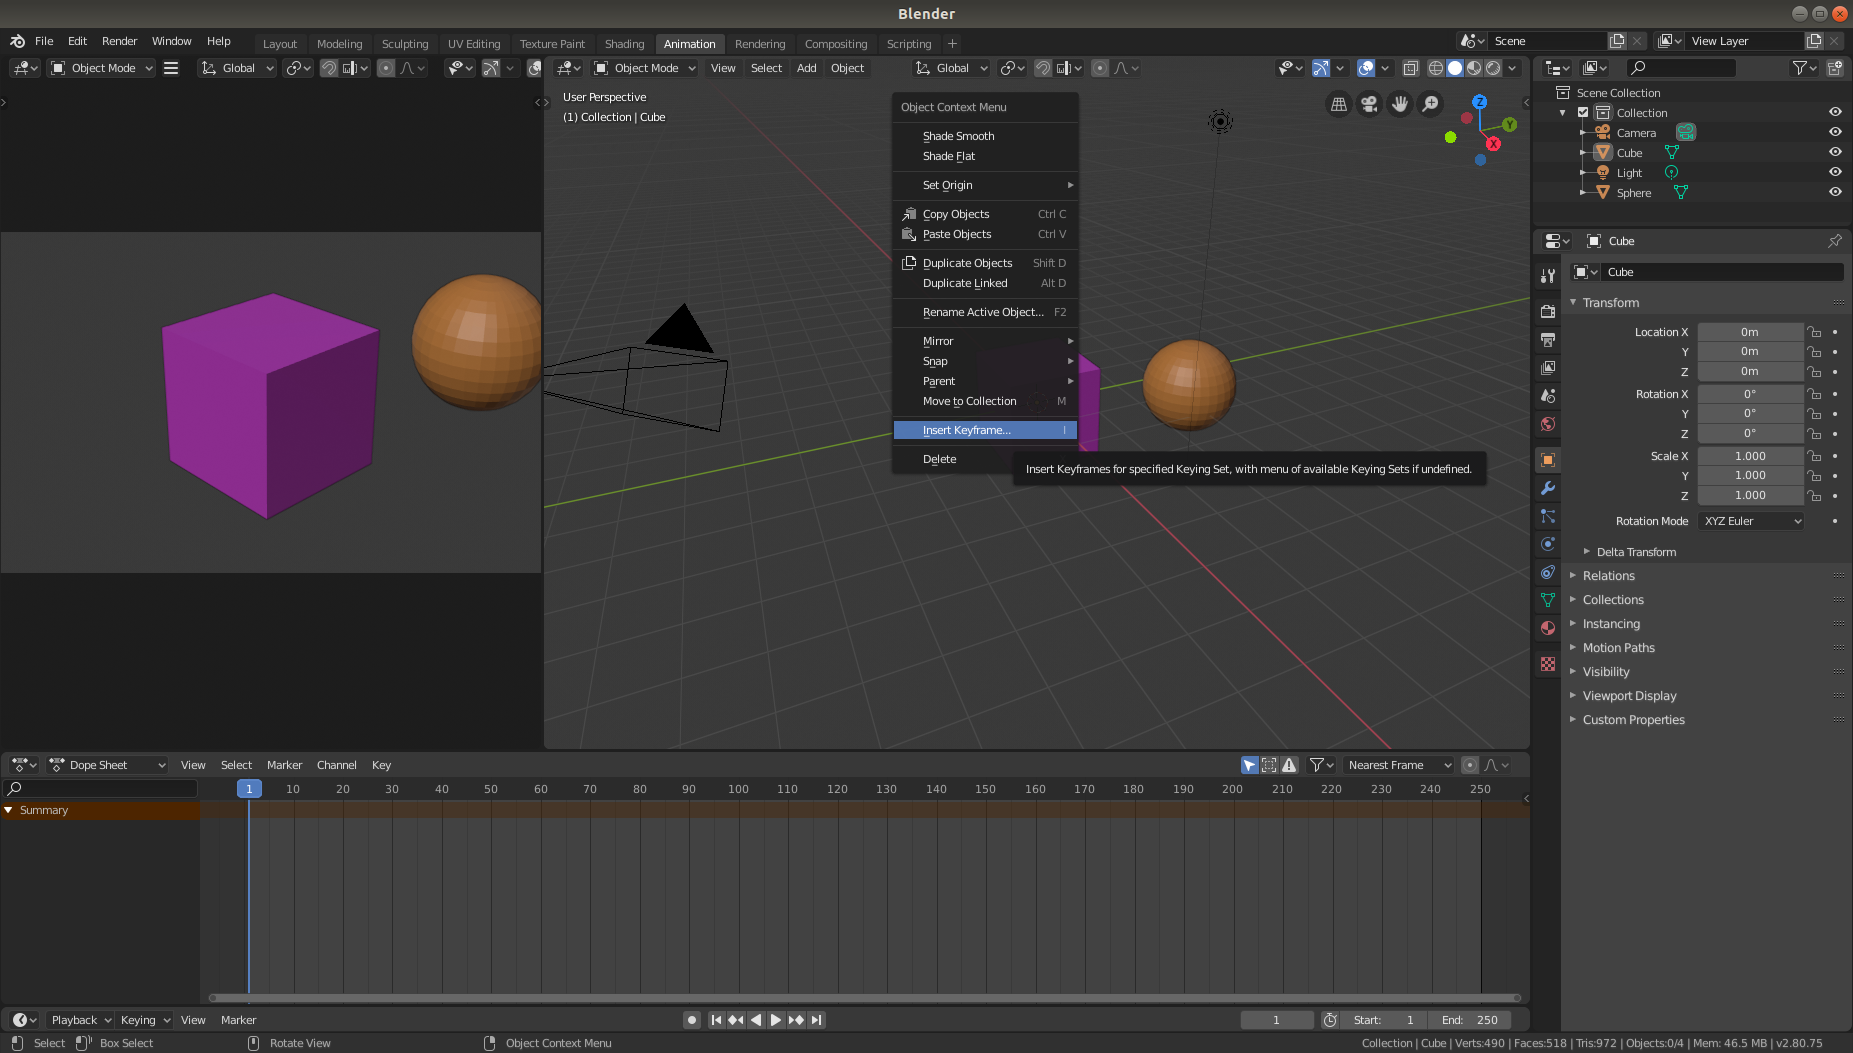 In Blender, a keyframe is a specific frame in the timeline that contains the attributes of models, such as their location, rotation, or size. You can read more about Blender keyframes.
Add a Location Keyframe to the sphere, as well. This tutorial will only cover the basics of animating location movements, however rotation and scale work similarly.
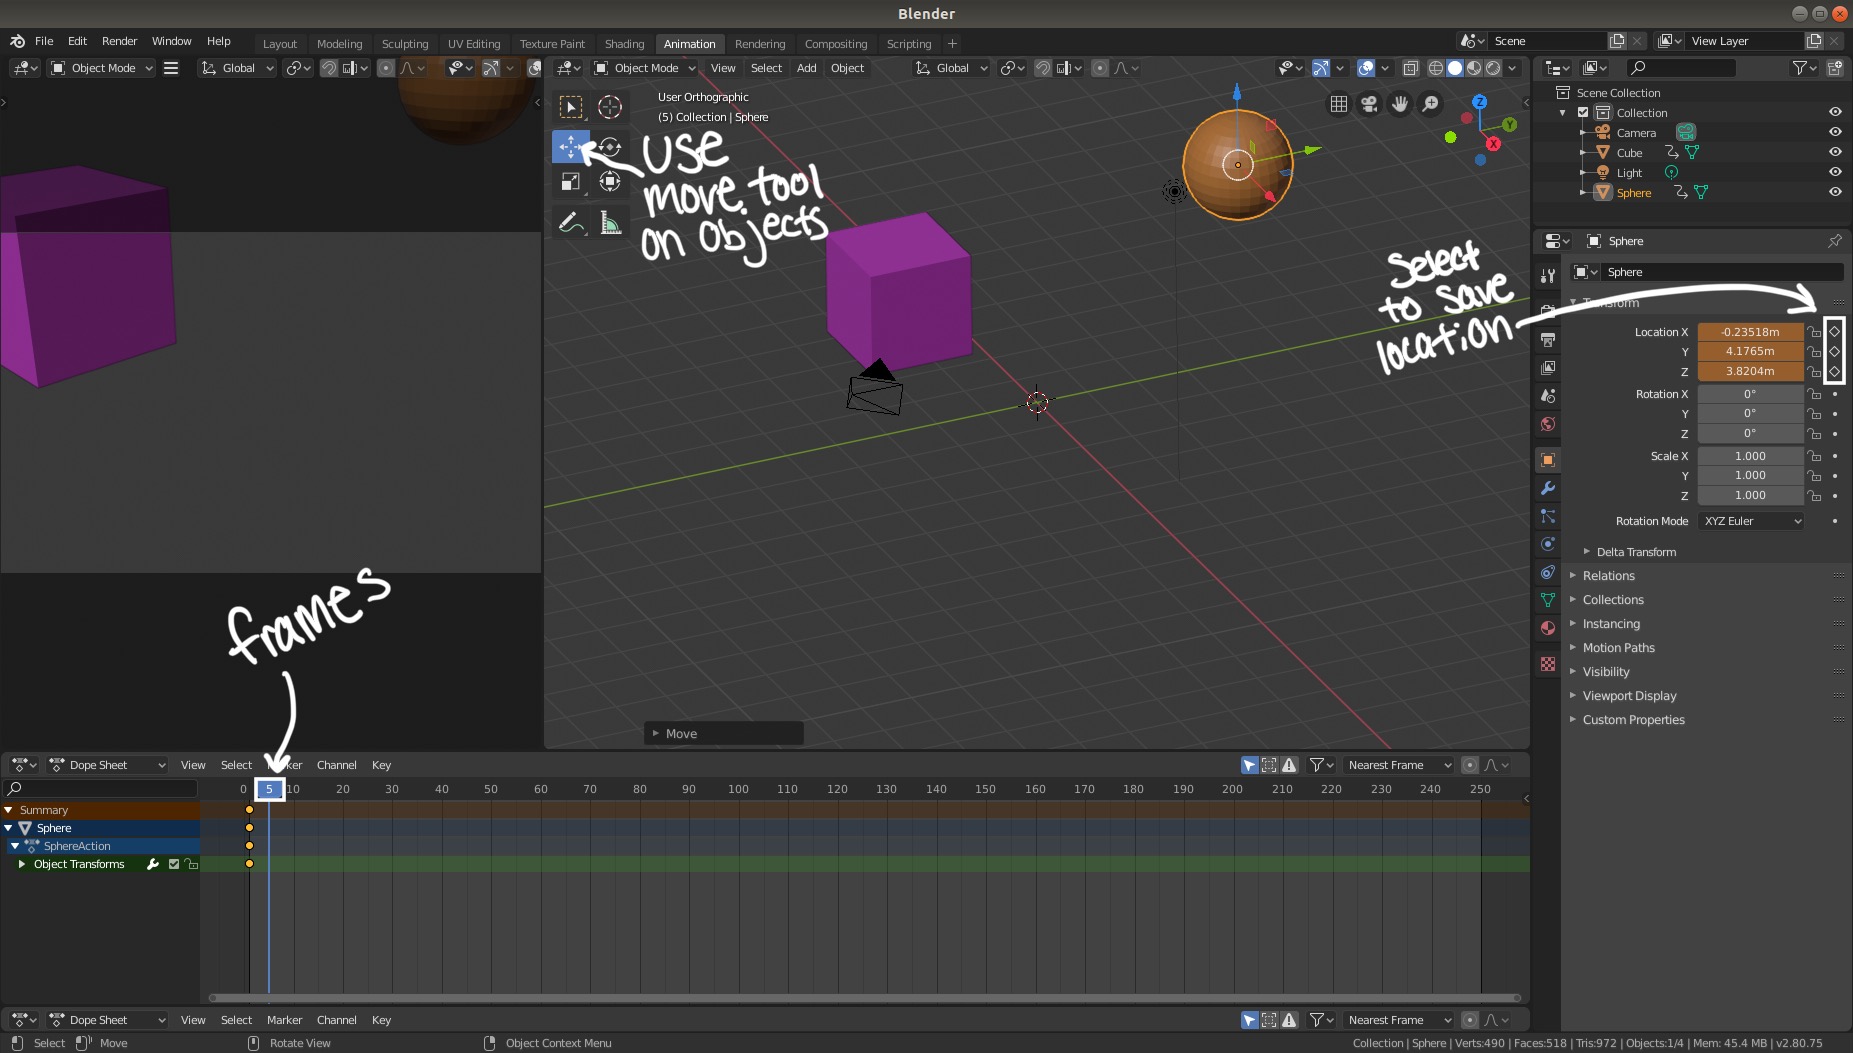
In the animation window at the bottom of the timeline, click on the numbers to switch frames. When moving objects, use the Move tool, or change the coordinates in the Context menu. Select the diamond next to each location coordinate in the Context menu in each frame that moves to save the change. Each model moves separately, but they do not have to move every frame. For simple animations, moving something every 5-10 frames is fine. The movements we set are at random, and they loop back to their original position.
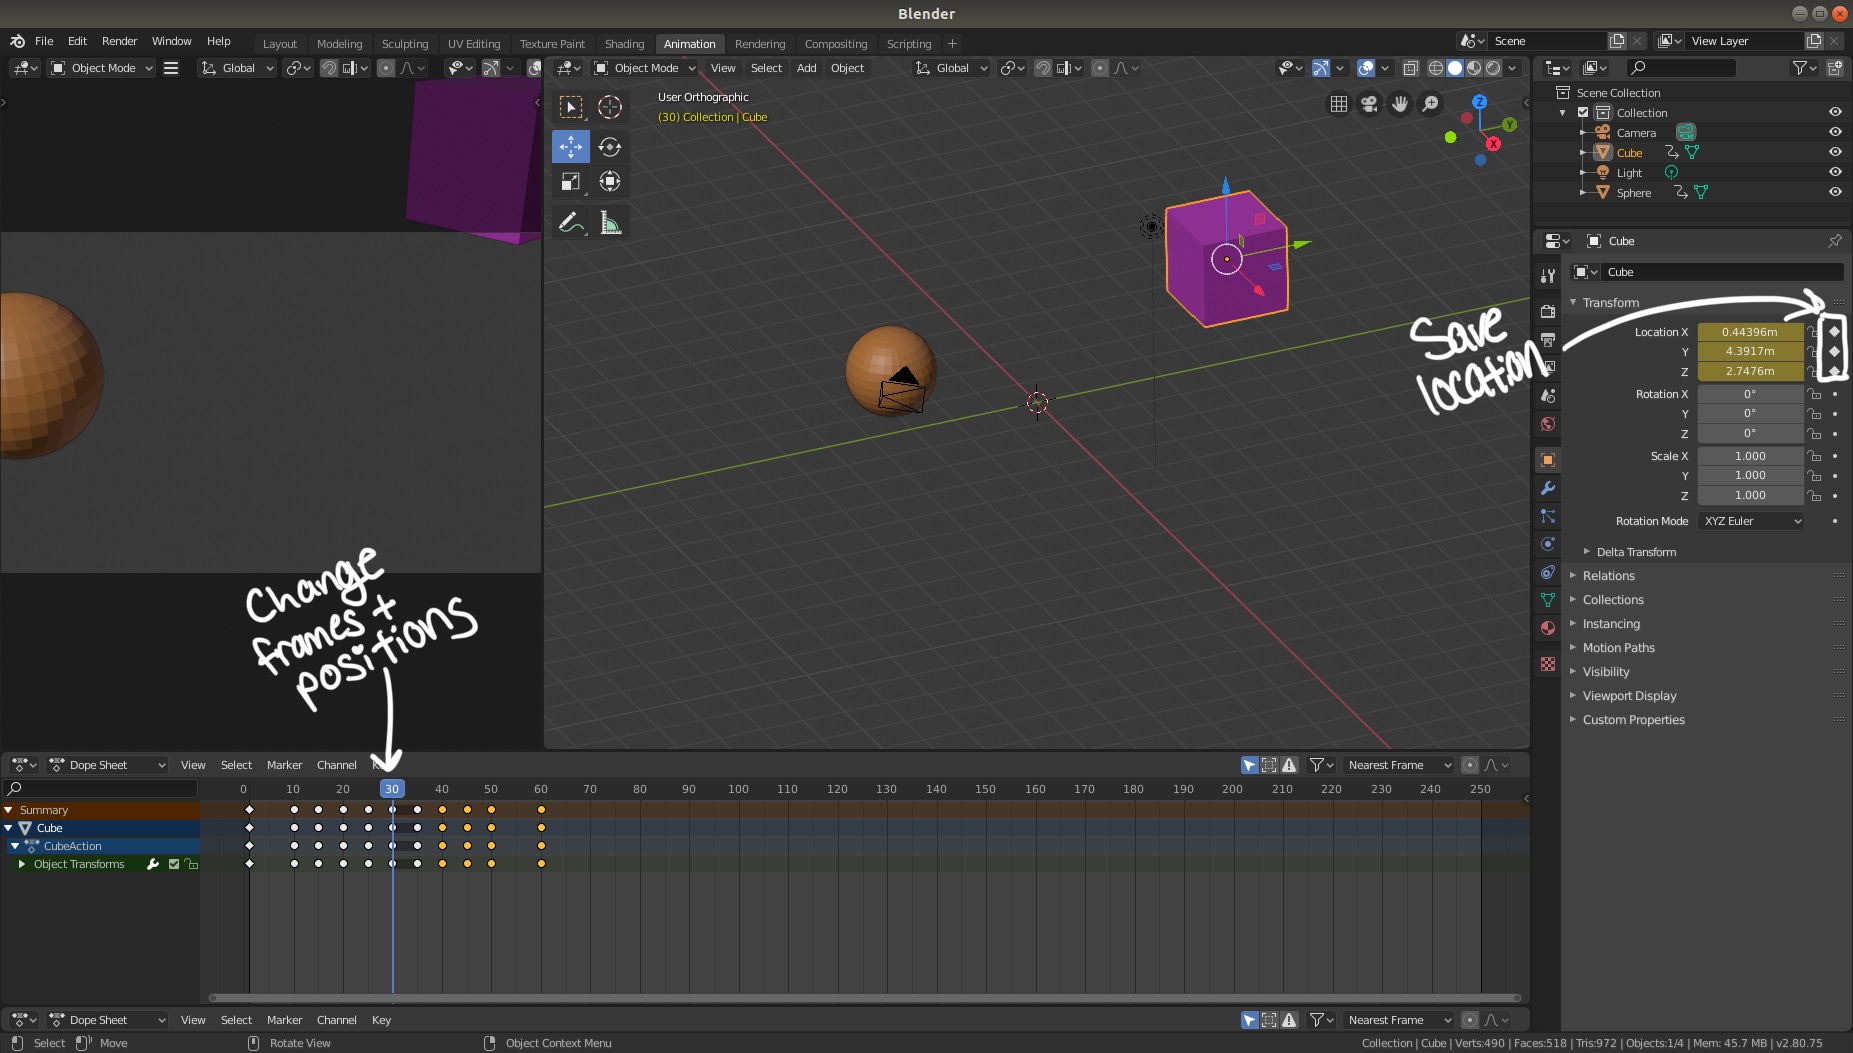
Switch back to the layout tab along the top. Here you can play back the animation, as well as adjust how long the animation is. We changed it from 250 to 100 frames, as we do not have 250 frames of content, and there would just be a long pause at the end of the animation.

Saving the Animation
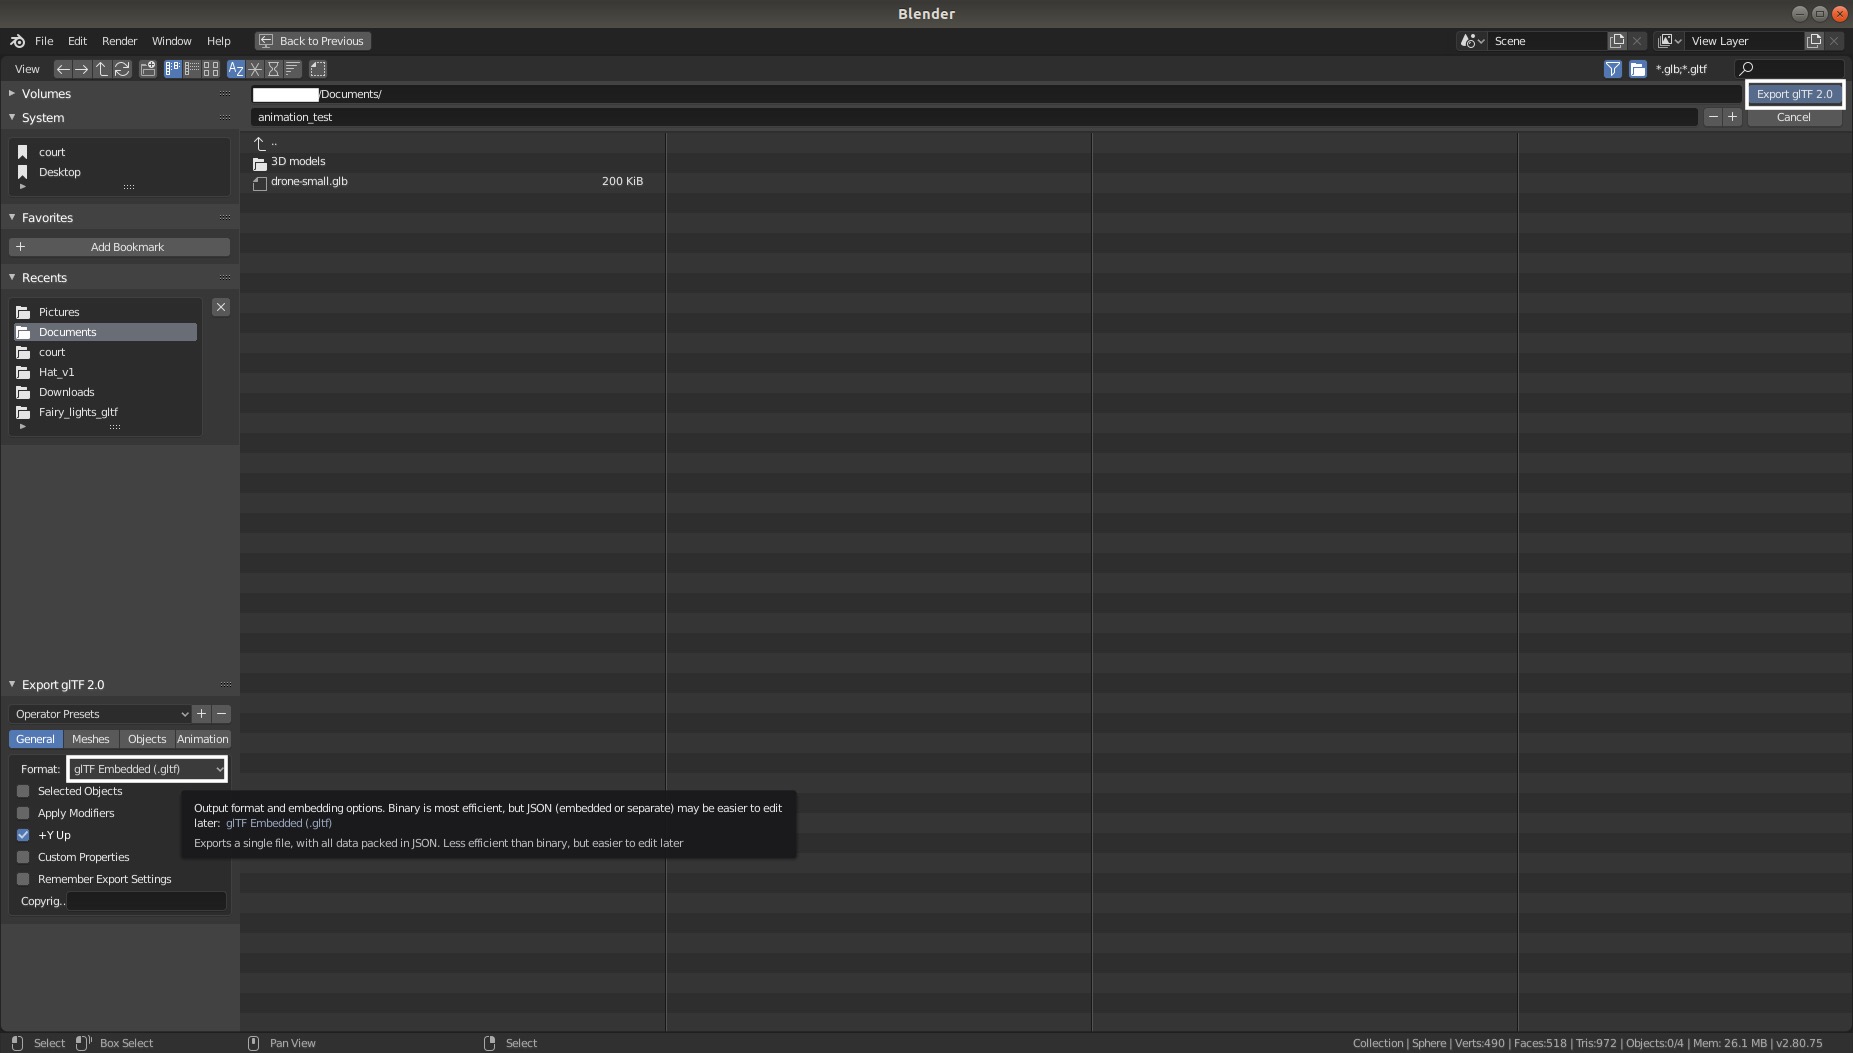
To save the animation, go to the menu at the top left of the window. Select File > Export > glTF 2.0 (.glb/.gltf).
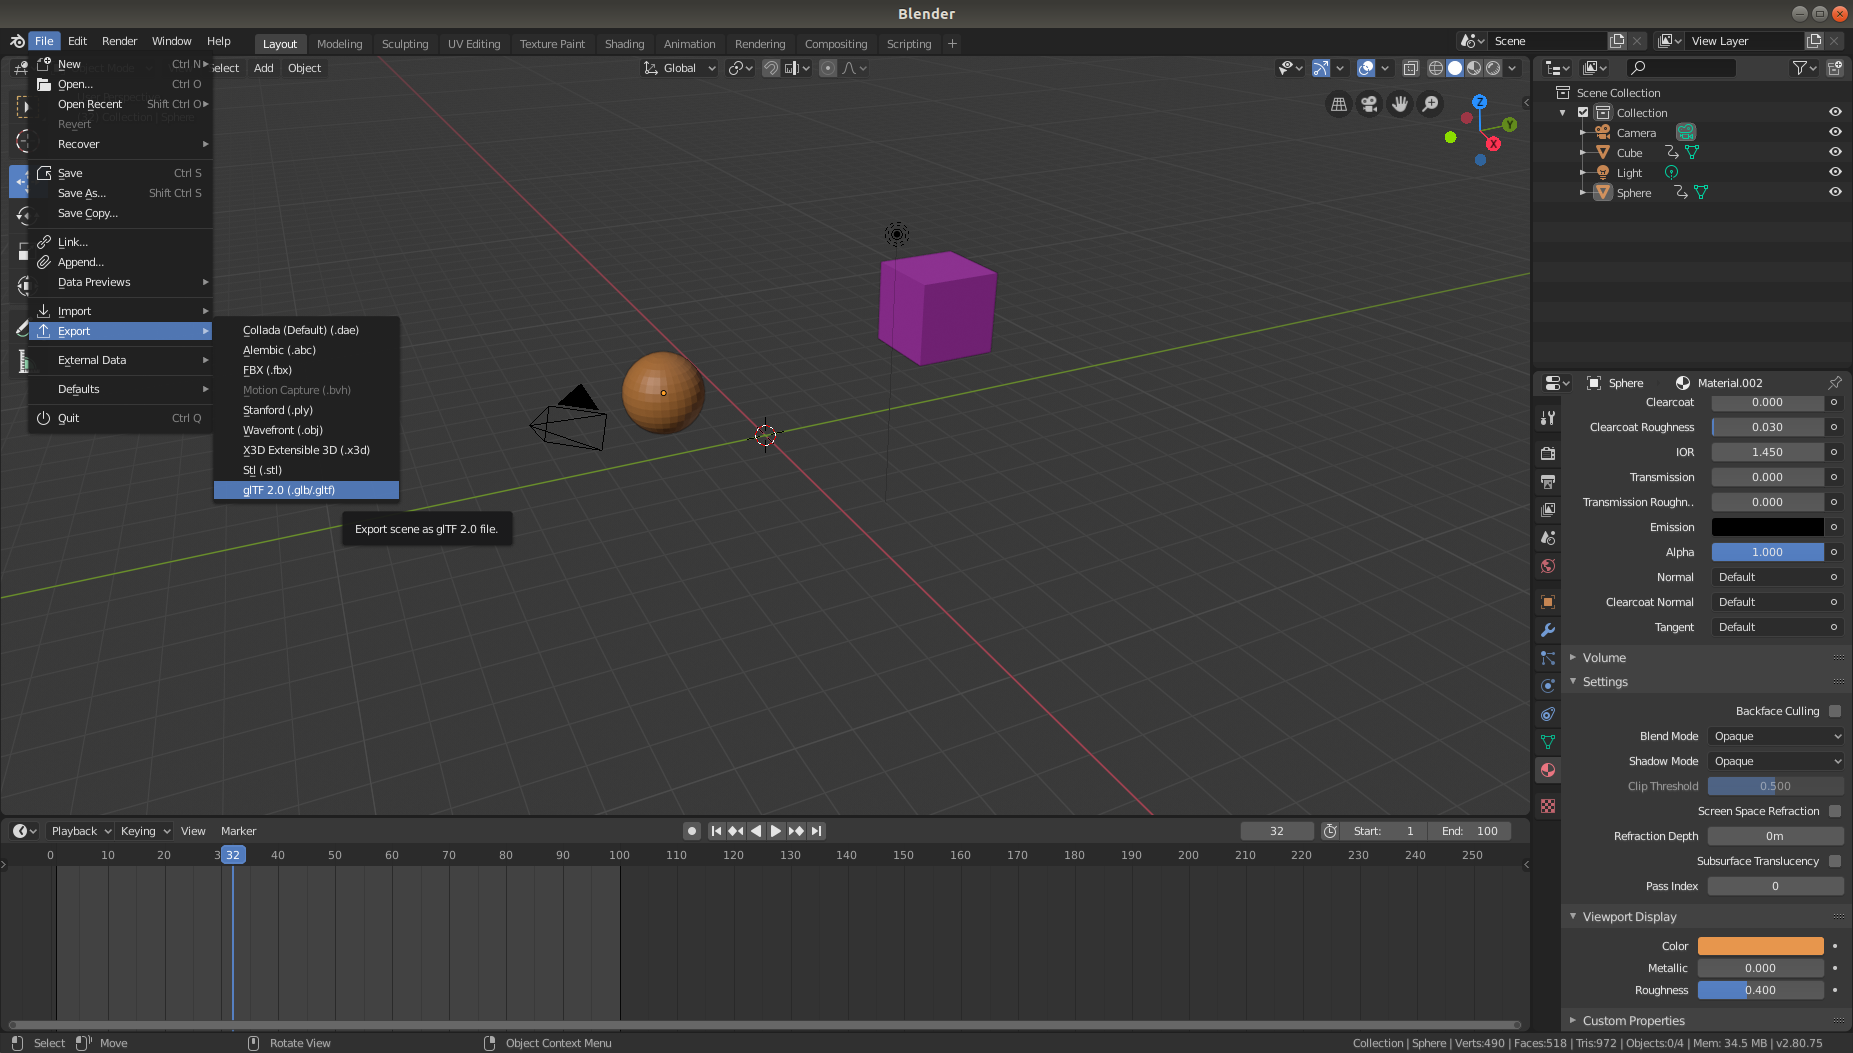
In the bottom left menu, select how you want to export the file. *.glb, *.gltf, and separate *.gltf are valid options. If using the separate *.gltf, make sure to upload the entire folder later. In this case, we are exporting it as a single *.gltf.
Testing the Animation
Don McCurdy’s gltf-viewer website will display animated glTF files.